Studio-One - How to load a Drum Map with MIDI note names (pitch names)
Why even use a drum map?
When you open a MIDI event with the MIDI editor in Studio-One, you will see the piano roll on the left side. The C keys and their octaves are all labeled, which is sufficient if you just have to deal with melodic MIDI events. But as soon as you want to edit or create drum grooves, only seeing the keys and notes is not very convenient. That is why some DAWs like Studio One support loading up external drum maps which will display every single drum name like Kick, Snare, Hi-Hat etc... instead of the piano roll (see right image).
This obviously makes drum programming much more convenient since you are going to actually see which drums you are about to draw into the MIDI editor. The guessing game will be over.
Step 1
Download the followig zip file and extract the drum map to any temporary location on your drive.
Step 2
Windows:
Open the installation folder of Studio One. By default it is C: ➔ Program Files ➔ Presonus ➔ Studio One 3. From there go to Presets ➔ User Presets ➔ Pitch Names. Put the previously extracted drum map file into this Pitch Names folder.Mac:
Right click on the Studio One app icon and select Show Package Contents. From there just navigate through the folders to Contents ➔ presets ➔ User Presets ➔ Pitch Names. Put the previously extracted drum map file into this Pitch Names folder.Please note that this drum map file only works with Studio-One. Other DAWs like Cubase and Reaper have their own drum map file format. You can find drum maps and instructions for these DAWs within the Presets section of this website as well.
Step 3
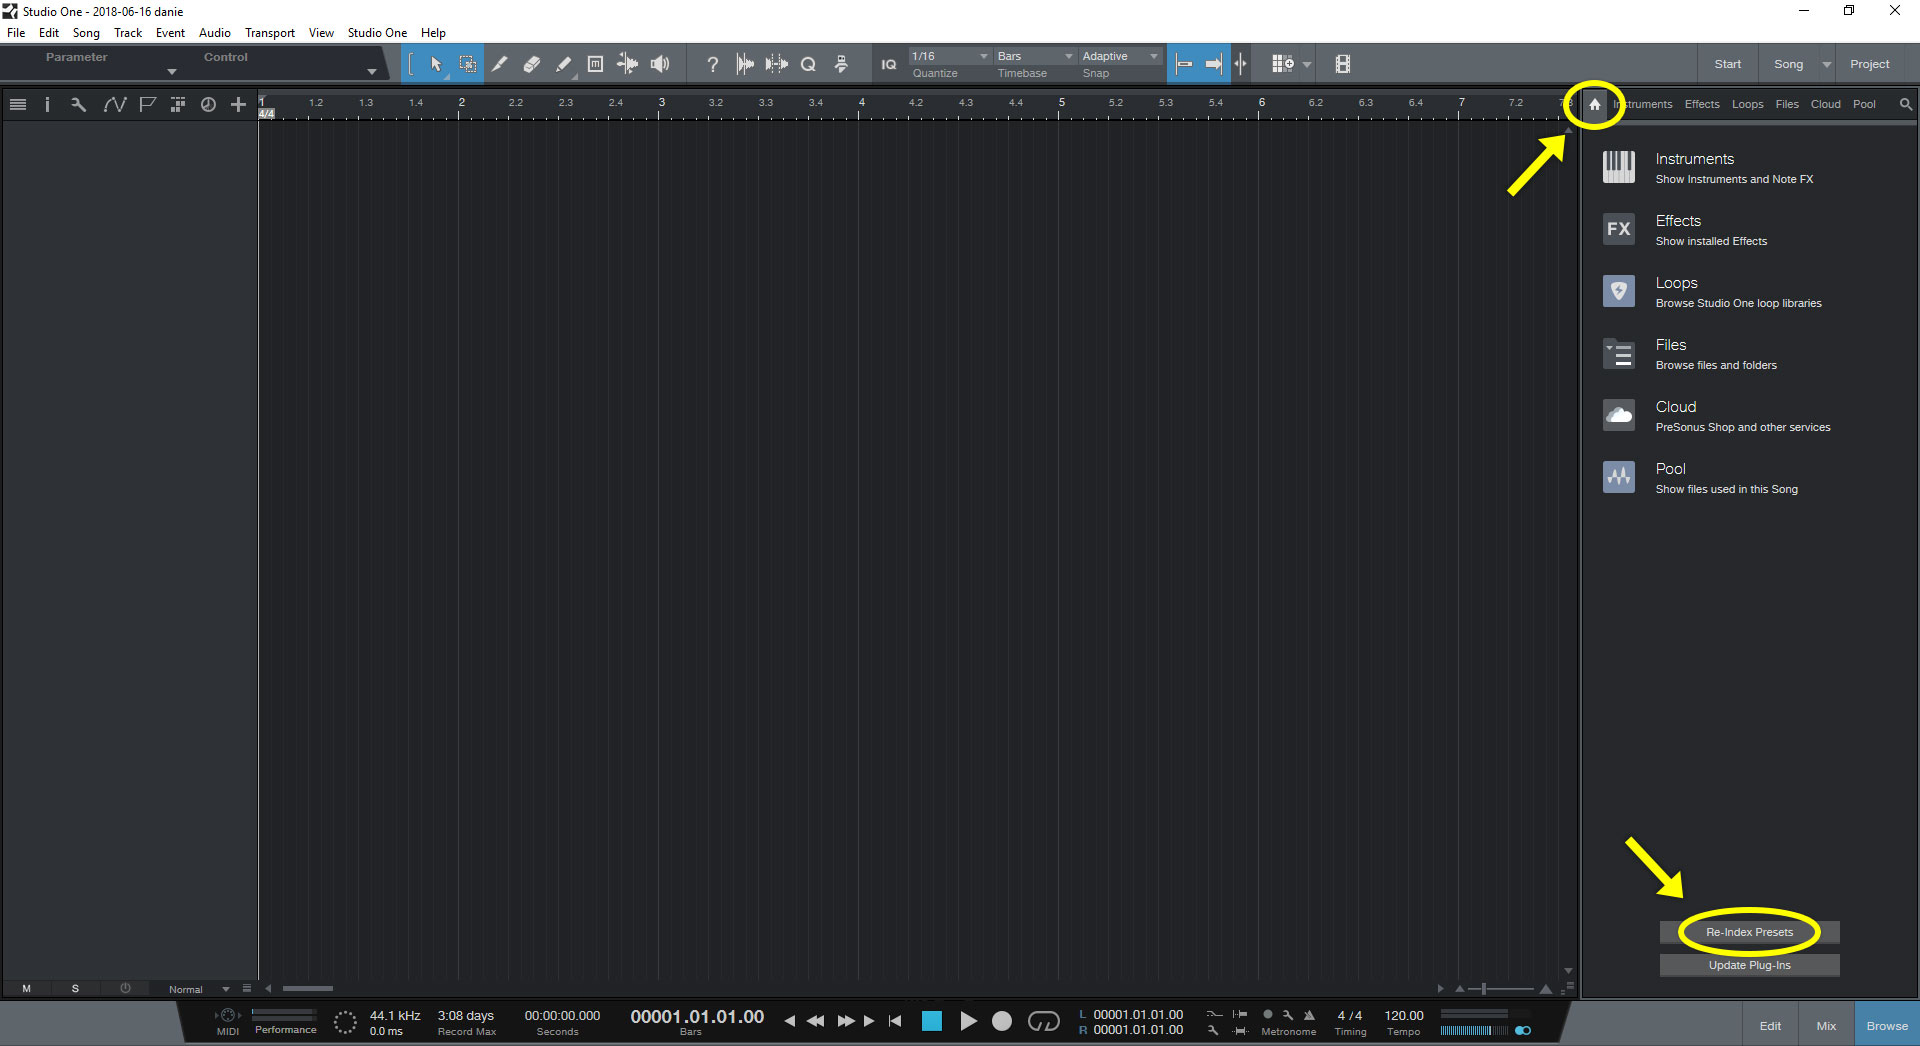
Open Studio One and click on the home icon on top of the right section. Click the button named Re-Index Presets, which will now have appeared at the bottom. This step is necessary in order to be able to load the drum map file later on.

Step 4
Create an instrument track with our drum plugin. Drag and drop a MIDI groove from the plugin to the track timeline. Double-click on the lower part of that MIDI event to open the MIDI editor, i.e. piano roll.

Step 5
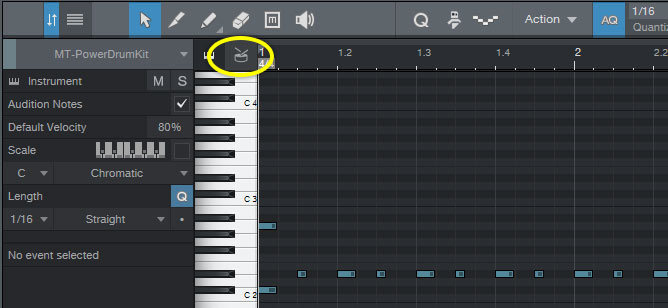
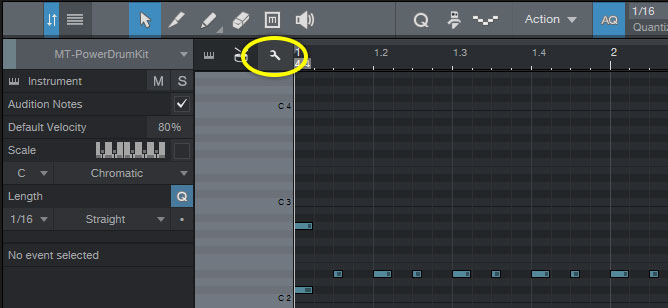
When the piano roll has opened, click on the drum icon at the top left. It will reveal a button with a settings icon to the right.

Step 6
Now click the settings button, which will have appeared to the right.

Step 7
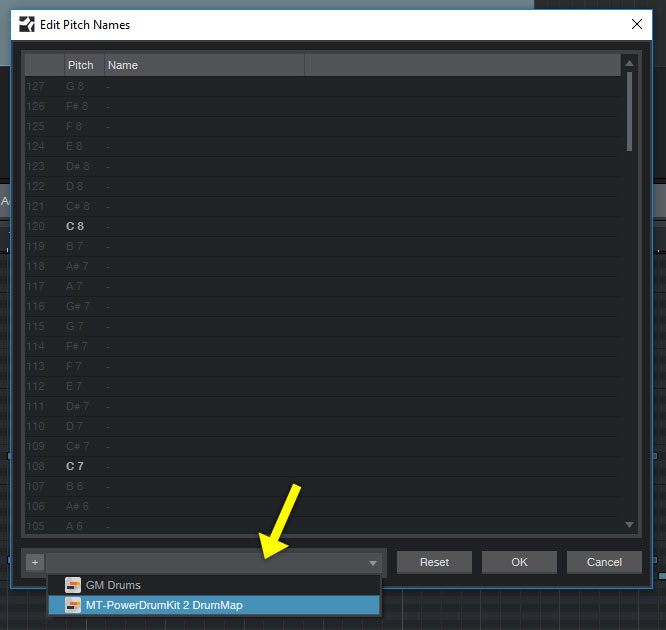
The Edit Pitch Names window will open up. Take a look at the drop down menu at the bottom. If the previous Re-Indexing was successful, you should now see the new drum map file inside the menu. Select it, and don't be confused if the table appears to be empty. You have to scroll down further in order to see the content, since not all MIDI notes are used by the plugin.

Confirm with OK to close the window.
That's it! When you double-click on the MIDI events of that track, they should now display drum names instead of the piano roll.
Enjoy enhanced and more convenient drum programming!


