Reaper - How to load a Drum Map with MIDI note names (pitch names)
Why even use a drum map?
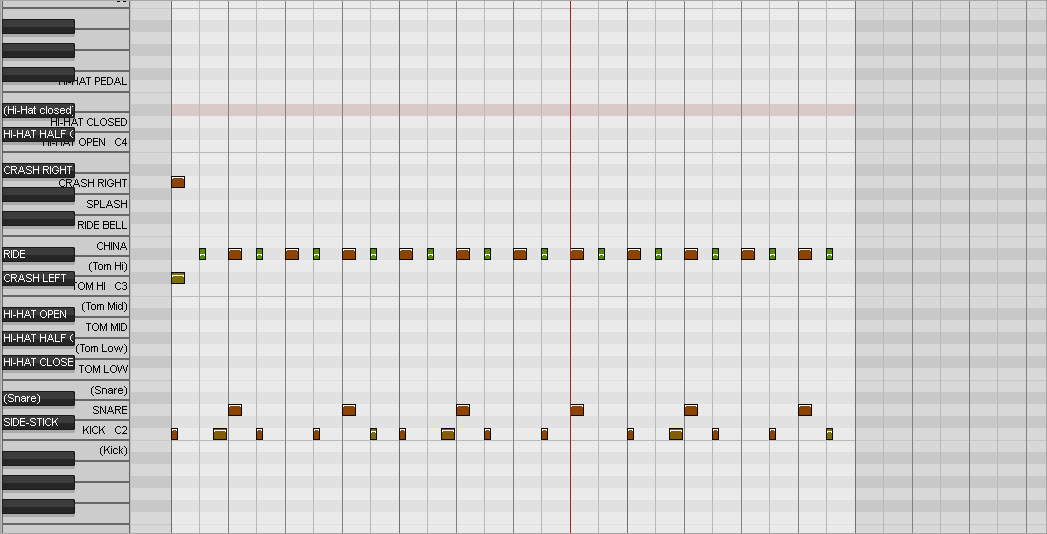
When you open a MIDI event with the MIDI editor in Reaper, you will see the piano roll on the left side. The C keys and their octaves are all labeled, which is sufficient if you just have to deal with melodic MIDI events. But as soon as you want to edit or create drum grooves, only seeing the keys and notes is not very convenient. That is why some DAWs like Studio One support loading up external drum maps which will display every single drum name like Kick, Snare, Hi-Hat etc... instead of the piano roll (see right image).
This obviously makes drum programming much more convenient since you are going to actually see which drums you are about to draw into the MIDI editor. The guessing game will be over.
Step 1
Download the followig zip file and extract the drum map to any temporary location on your drive.
Please note that this drum map file only works with Reaper. Other DAWs like Cubase and Studio-One have their own drum map file format. You can find drum maps and instructions for these DAWs within the Presets section of this website as well.
Step 2
Open Reaper, create a track, and load the drum instrument as an FX. Drag and drop a MIDI groove from the plugin to the track timeline. Double-click on that MIDI event to open the MIDI editor, i.e. piano roll.

Step 3
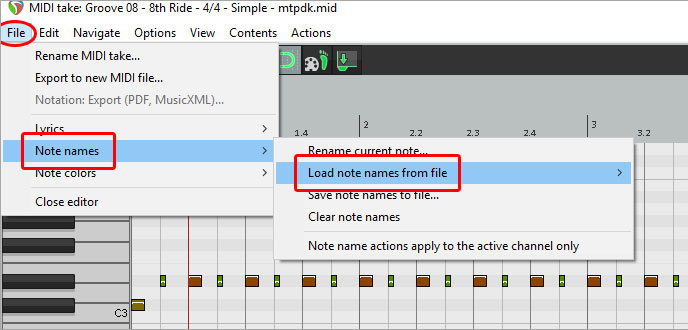
When the piano roll has opened, go to
File -> Note names -> Load note names from file -> Choose file
and open the previously extracted drum map file.

That's it! All the notes assigned to the plugin should now display drum names on top of the piano roll.

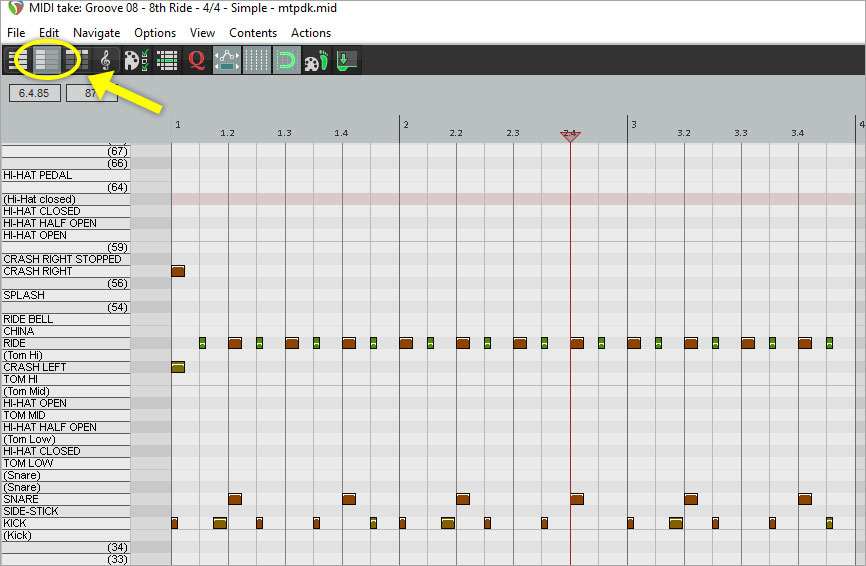
By clicking the second option on the top left of the MIDI editor window, you can even switch to a view with no piano keys at all, but just the drum names. That is optional, although you might consider it to be more clear.

Enjoy enhanced and more convenient drum programming!


